
Pantry Makeover! Getting rid of those wire shelves with an Ikeahack
I've always loathed wire shelving in all it's forms... but I do understand why they are used. Lightweight, easy to install, and cost effective - they seem to be the shelving of choice for builders du jour. If you're stuck with unsightly wire shelving - I have the solution for you!
After trying to figure out a way to do built-ins on our own and without custom cabinetry, I turned to the trusted and faithful BILLY from Ikea. Billy comes in two depths (12 and 15 inches I believe), and by choosing the shallower of the two, I not only gave myself some extra space in our walk through pantry, but I avoided the "black hole" - where food items get lost and never used because they are way in the back. You'd never know these are budget bookcases - they look like they were designed to be in a pantry.
After trying to figure out a way to do built-ins on our own and without custom cabinetry, I turned to the trusted and faithful BILLY from Ikea. Billy comes in two depths (12 and 15 inches I believe), and by choosing the shallower of the two, I not only gave myself some extra space in our walk through pantry, but I avoided the "black hole" - where food items get lost and never used because they are way in the back. You'd never know these are budget bookcases - they look like they were designed to be in a pantry.

Before our pantry overhaul, my pantry sadly looked like this (can't believe I'm sharing this!).

Granted, I knew we were ripping it all out so I didn't invest any time in making it pretty - seriously, how big of a transformation is that?
Taking out the wire shelving, patching and painting was a bit of a task (the wire shelves were anchored with some pretty serious drywall screws) - but my husband and father-in law tackled it like pros.


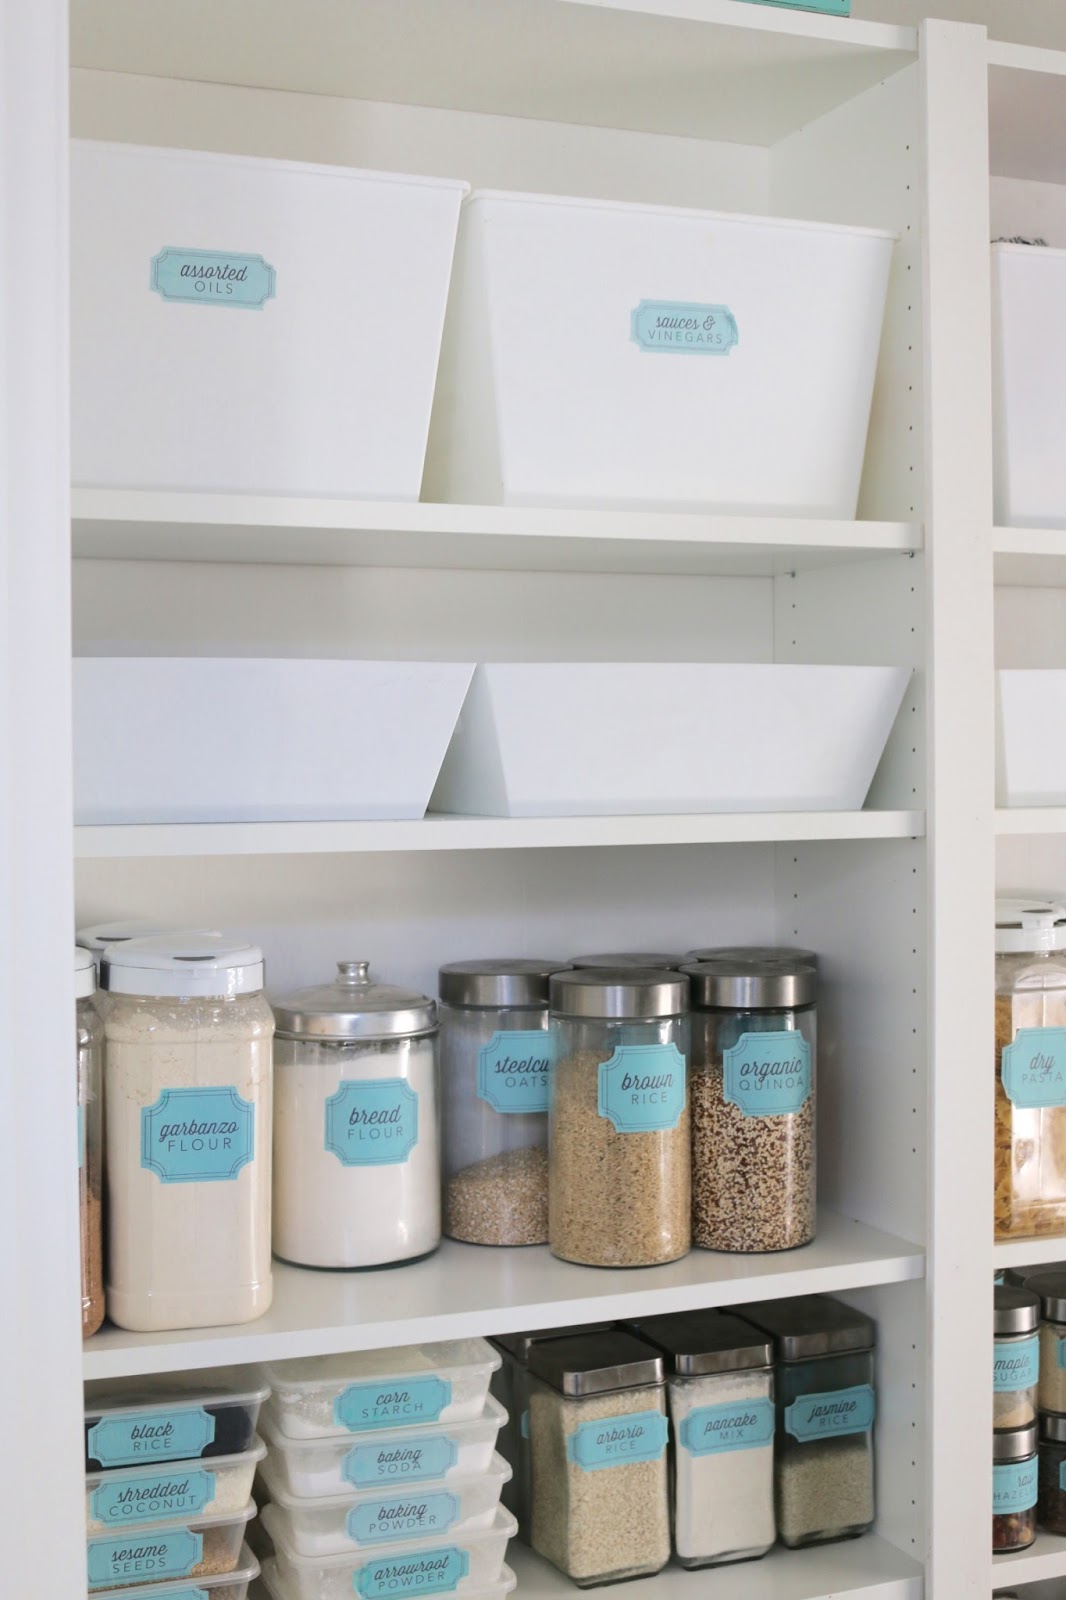
I customized my shelf heights to the heights of my jars and was so happy how it all worked out - another big plus about this project is how easy it is to adjust shelf height to accommodate different sized items - something you can't do with wire shelves.


While the pantry doesn't always look as clutter-free as these images, the reality is pretty darn close. I've found it really easy to maintain when you have a home for everything. I wanted to redo my labels prior to this post, but with the move ahead just didn't have the time. These labels are going on 2.5 years and still kicking - although some have definitely seen better days. I'm still amazed at how long they've held up though!
Have you ever used a Billy in a non-bookcase way? Do you have wire shelves you hate as much as I do?
Have you ever used a Billy in a non-bookcase way? Do you have wire shelves you hate as much as I do?


Love this!! Im always looking for ways to save money on projects! This is a great option! And yes... I hate wire anything and I also have a deep pantry which I call the black hole!!
ReplyDeleteHi Jen! Always happy to see one of your blog posts pop up :) I'm wondering how your labels are holding up these days and what you're using to adhere them to the containers, as well as smudge proof them? Are you still using the Krylon spray and a glue runner to attach them? Or are these self-adhering? Weather-proof labels? Thanks and can't wait to hear about the new move - wow!
ReplyDeleteHi Kim! I just use full page mailing labels (not weather proof) and I don't often Krylon them. I still find they hold up quite well without those extra measures, however you're sure to extend the life of your labels if you do take the time to do those things!
DeleteHi Jen,
ReplyDeleteCan u please tell us were you purchase the white storage bins located on second shelve below the bread wooden box? thx Alicia
Hi Alicia! Those are from Dollorama, a dollar store in Canada.
DeleteHi Jen,
ReplyDeleteCan u please tell us were you purchase the white storage bins located on second shelve below the bread wooden box? thx Alicia
SO sorry for the late reply! It was Dolloarama!
Delete